사내 프로젝트를 하던 도중 기존에 사용하던 에디터가 너무 오래되어 교체를 할 필요성이 생겨
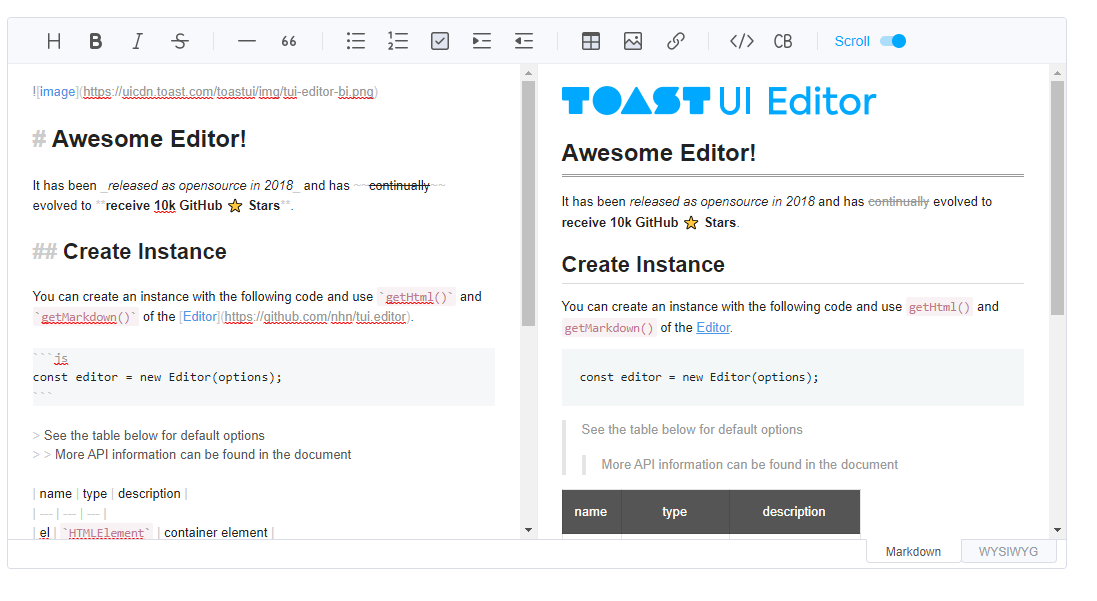
에디터를 새로 적용하기로 하였고 고민하던 도중 nhn에서 운영하는 오픈소스인 Toast Ui를 활용하기로 하였다.
처음에 사용한 Toast Editor는 Toast Ui에서 자체 vue로 래핑된 라이브러리를 제공해서 사용했었다.
https://github.com/nhn/tui.editor/tree/master/apps/vue-editor
GitHub - nhn/tui.editor: 🍞📝 Markdown WYSIWYG Editor. GFM Standard + Chart & UML Extensible.
🍞📝 Markdown WYSIWYG Editor. GFM Standard + Chart & UML Extensible. - GitHub - nhn/tui.editor: 🍞📝 Markdown WYSIWYG Editor. GFM Standard + Chart & UML Extensible.
github.com
위 라이브러리의 DOC를 읽어서 정상 동작 까지는 확인을 했다.! 하지만 여기서 문제가 생겼다.
Toast Editor에서 제공하는 코드 하이라이팅 모듈에서 에러가 발생해 정상적으로 코드하이라이팅및 에디터가 동작하지않는다...
GitHub - nhn/tui.editor: 🍞📝 Markdown WYSIWYG Editor. GFM Standard + Chart & UML Extensible.
🍞📝 Markdown WYSIWYG Editor. GFM Standard + Chart & UML Extensible. - GitHub - nhn/tui.editor: 🍞📝 Markdown WYSIWYG Editor. GFM Standard + Chart & UML Extensible.
github.com
그래서 어쩔수없이 vue로 랩핑된 toast editor가 아닌 기존 toast ui를 ref 속성을 활용해서 해당 Edtior와 Viewer를 컴포넌트로 만들어줘서 작업해 주었다.
https://ui.toast.com/tui-editor
TOAST UI :: Make Your Web Delicious!
TOAST UI is an open-source JavaScript UI library maintained by NHN Cloud.
ui.toast.com

Editor
ToastEdtior.vue
<template>
  <div class="toast-edit" ref="editor"></div>

</template>

<script>
import "prismjs/themes/prism.css";
import "@toast-ui/editor-plugin-code-syntax-highlight/dist/toastui-editor-plugin-code-syntax-highlight.css";
import "tui-color-picker/dist/tui-color-picker.css";
import "@toast-ui/editor-plugin-color-syntax/dist/toastui-editor-plugin-color-syntax.css";

import colorSyntax from "@toast-ui/editor-plugin-color-syntax";
import Prism from "prismjs";
import "prismjs/components/prism-c";
import "prismjs/components/prism-cpp";
import "prismjs/components/prism-java";
import "prismjs/components/prism-python";
import "@toast-ui/editor/dist/i18n/ko-kr";
import Editor from "@toast-ui/editor";
import codeSyntaxHighlight from "@toast-ui/editor-plugin-code-syntax-highlight";

import api from "../api";
export default {
  components: {
  },
  props: {
    data: {
      type: String,
      default: "",
    },

  },
  data() {
    return {
      changedPrism: null,
      editor: null,

    };
  },
  mounted() {
    this.changedPrism = Prism;

    this.setEditor();
    if (this.data) {
      try {
        this.editor.setMarkdown(this.data);
      } catch (e) {
        this.editor.setHTML(this.data);
      }
    }
  },
  methods: {
    setEditor(data) {
      this.editor = new Editor({
        el: this.$refs.editor,
        plugins: [
          colorSyntax,
          [codeSyntaxHighlight, { highlighter: this.changedPrism }],
        ],
        initialEditType: "wysiwyg",
        language: "ko",
        events: {
          change: this.onChangeEditor,
        },
        hooks: {
          addImageBlobHook: this.addImageBlobHook,
        },
      });
    },

    async addImageBlobHook(file, setText, type) {
      try {
        if (!file) return false;

        // 이미지 제외 막기 처리하기
        if (file && file.size > 5242880) {
          const size = (file.size / (1000 * 1000)).toFixed(1);
          alert(
            `최대 업로드 사이즈(5 MB)를 초과 하였습니다.\n현재 사이즈 ${size}MB`
          );

          return false;
        }
        // api 업로드 만들기
        const formData = new FormData();
        formData.append("image", file);
        const { data } = await api.uploadImageFile(formData);
        if (data.success === true) {
          setText(data.file_path, "image");
        }

        //
      } catch (e) {
        alert("파일 업로드에 실패하였습니다");
      }
    },

    onChangeEditor() {
      this.editorText = this.editor.getMarkdown();

    },
  },
  watch: {
    // watch를 활용한 props 변경 감지
    data(newValue) {
      if (this.editorText !== newValue) {
        this.editor.setMarkdown(newValue);
      }
    },

    editorText(newValue, oldValue) {
      if (newValue !== oldValue) {
        this.$emit("setContent", this.editor.getMarkdown());
      }
    },
  },
};
</script>

<style>

</style>
위 Code의 특징은 다음과 같다.
1. 파일 업로드 기능
기존 toast Editor는 이미지를 업로드하면 base 64 형태로 변환이 돼서 저장이 된다.
이렇게 저장하게 되면 이미지가 문자열로 변경돼서 저장되기 때문에 해당 toast editor에서 제공하는 addImageBlob hook을 활용해서 해당 코드 부분을 변경해주었다.
    async addImageBlobHook(file, setText, type) {
      try {
        if (!file) return false;

        // 이미지 제외 막기 처리하기
        if (file && file.size > 5242880) {
          const size = (file.size / (1000 * 1000)).toFixed(1);
          alert(
            `최대 업로드 사이즈(5 MB)를 초과 하였습니다.\n현재 사이즈 ${size}MB`
          );

          return false;
        }
        // api 업로드 만들기
        const formData = new FormData();
        formData.append("image", file);
        // 요청 보내고
        // 해당 부분은 구현해야한다
        // const { data } = await api.uploadImageFile(formData);
        //  if (data.success === true) {
          setText(data.file_path, "image");
         // }

      } catch (e) {
        alert("파일 업로드에 실패하였습니다");
      }
    },
2. props/emit을 활용한 데이터 감지
해당 컴포넌트는 공통적으로 사용되어야 하기 때문에 vue의 watch 속성을 활용해주었다.
props로 넘겨받은 값은 watch가 감시하고 data가 넘어온 경우 그에 맞게 editor의 값을 수정해준다.
editorText 함수는 해당 에디터내 값이 변경되면 자동적으로 $emit을 통해 부모 컴포넌트에 사용하는 기능이다
watch: {
    // watch를 활용한 props 변경 감지
    data(newValue) {
      if (this.editorText !== newValue) {
        this.editor.setMarkdown(newValue);
      }
    },

    editorText(newValue, oldValue) {
      if (newValue !== oldValue) {
        this.$emit("setContent", this.editor.getMarkdown());
      }
    },
  },
부모 컴포넌트에서 활용하는법
해당 ToastEditor를 가져와서 값을 넣어야하는경우(글 수정등) data에 값을 넣어주고
에디터 내에서 변경된 값들은 setContet함수를 통해 값이 담긴다.
<template>
    <div>
    	<ToastEditor :data="content" @setContent="setContent"  />
    </div>
</template>

<script>
import ToastEditor from "@/pages/admin/components/ToastEditor";

export default {
  name: "create",
  components:{
  	ToastEditor
  },
  data() {
    return {
      content: "",
    };
  },
  methods: {
  //해당 setContent함수를 통해 emit으로 전달받아 값을 새로 저장한다
    setContent(e){
      this.content = e;
    }
  },
};
</script>
Viewer
viewer는 props로 받은 데이터를 변경해서 보여주기만 하면 된다
<template>
  <div class="toast-viewer">
    <div ref="viewer" >
    </div>
  </div>
</template>

<script>
import "@toast-ui/editor/dist/toastui-editor-viewer.css";
import 'prismjs/themes/prism.css';
import '@toast-ui/editor-plugin-code-syntax-highlight/dist/toastui-editor-plugin-code-syntax-highlight.css';
import Prism from 'prismjs';
import "prismjs/components/prism-c";
import "prismjs/components/prism-cpp";
import "prismjs/components/prism-java";
import "prismjs/components/prism-python";
import Viewer from '@toast-ui/editor/dist/toastui-editor-viewer';
import codeSyntaxHighlight from '@toast-ui/editor-plugin-code-syntax-highlight';
export default {
  props:['content'],
  data(){
    return{
      viewer:null
    }
  },
  mounted() {
    this.getViewer();
    this.viewer.setMarkdown(this.content);
  },
  methods: {
    getViewer() {
       this.viewer =  new Viewer({
          el: this.$refs.viewer,
            plugins: [[codeSyntaxHighlight, { highlighter: Prism }]]
        });
    },
  },
};
</script>

<style>

</style>
'Vue > vue 활용하기' 카테고리의 다른 글
| Spring-boot(mysql-mybatis-aws s3(cloudFront) + Vue.js 를 활용한 파일 업로드 하기 - 프론트 구성 (0) | 2020.04.12 |
|---|---|
| vue image preview(vue 이미지 미리보기) 컴포넌트 만들기 (0) | 2020.04.12 |

