https://github.com/loy124/express-mongodb-template
loy124/express-mongodb-template
express 와 mongodb를 연동해서 회원가입및 로그인을 구현해둔 예제입니다. Contribute to loy124/express-mongodb-template development by creating an account on GitHub.
github.com
로그인시 필요한 내용들
로그인요청을 보낸다(post)-> 받은 비밀번호를 암호화(bcrypt) -> 비교후 boolean 값 리턴 -> true일때 토큰 생성 ->
토큰을 세션및 DB에 저장
먼저
로그인요청을 보낸다(post)-> 받은 비밀번호를 암호화(bcrypt) -> 비교후 boolean 값 리턴 의 기능을 먼저 만들어 보겠다.
비밀번호를 암호화해서 기존의 비밀번호와 암호화된 비밀번호를 구분할 수 있는
comparePassword 함수를 제작해준다.
bcrypt의 compare 함수는 기본적으로 Promise 형태를 리턴하기 때문에
callback 방식으로 되어있는 예제에서 리팩토링을 진행해보았다


User.js
const mongoose = require("mongoose");
const bcrypt = require("bcrypt");
const saltRounds = 10;

const userSchema = mongoose.Schema({
  name: {
    type: String,
    maxlength: 50,
  },
  email: {
    type: String,
    trim: true, //dhsdb 1541 @naver.com 을 dhsdb1541@naver.com로 trim
    unique: 1,
  },
  password: {
    type: String,
    minLength: 5,
  },
  lastName: {
    type: String,
    maxLength: 50,
  },
  role: {
    type: Number,
    default: 0,
  },
  image: String,
  token: {
    type: String,
  },
  tokenExp: {
    type: Number,
  },
});

//save 메소드가 실행되기전에 비밀번호를 암호화하는 로직을 짜야한다
userSchema.pre("save", function (next) {
  let user = this;

  //model 안의 paswsword가 변환될때만 암호화
  if (user.isModified("password")) {
    bcrypt.genSalt(saltRounds, function (err, salt) {
      if (err) return next(err);
      bcrypt.hash(user.password, salt, function (err, hash) {
        if (err) return next(err);
        user.password = hash;
        next();
      });
    });
  } else {
    next();
  }
});

userSchema.methods.comparePassword = function (plainPassword) {
  //plainPassword를 암호화해서 현재 비밀번호화 비교
  return bcrypt
    .compare(plainPassword, this.password)
    .then((isMatch) => isMatch)
    .catch((err) => err);
};

const User = mongoose.model("User", userSchema);

module.exports = { User };
server.js
const express = require("express");
const app = express();
const port = 9000;
const bodyParser = require("body-parser");
const mongoose = require("mongoose");
const { User } = require("./models/User");

app.use(bodyParser.urlencoded({ extended: true }));
app.use(bodyParser.json());

//이곳에 mongodb 사이트에서 카피한 주소를 이곳에 넣으면 된다.
const dbAddress =
  "mongodb+srv://root:root@cluster0-f3nrh.mongodb.net/<dbname>?retryWrites=true&w=majority";

mongoose
  .connect(dbAddress, {
    useNewUrlParser: true,
    useUnifiedTopology: true,
    useCreateIndex: true,
    useFindAndModify: false,
  })
  .then(() => console.log("MongoDB Connected"))
  .catch((err) => console.log(err));

app.get("/", (req, res) => res.send("Hello world!!!!"));

app.post("/register", (req, res) => {
  //회원가입을 할때 필요한것
  //post로 넘어온 데이터를 받아서 DB에 저장해준다
  const user = new User(req.body);
  user.save((err, userInfo) => {
    if (err) return res.json({ success: false, err });
    return res.status(200).json({ success: true });
  });
});

app.post("/login", (req, res) => {
  //로그인을할때 아이디와 비밀번호를 받는다
  User.findOne({ email: req.body.email }, (err, user) => {
    if (err) {
      return res.json({
        loginSuccess: false,
        message: "존재하지 않는 아이디입니다.",
      });
    }
    user
      .comparePassword(req.body.password)
      .then((isMatch) => {
        if (!isMatch) {
          return res.json({
            loginSuccess: false,
            message: "비밀번호가 일치하지 않습니다",
          });
        }
        return res.json({
          loginSuccess: true,
        });
      })
      .catch((err) => res.json({ loginSuccess: false, err }));
    //비밀번호가 일치하면 토큰을 생성한다
    //해야될것: jwt 토큰 생성하는 메소드 작성
  });
  // 비밀번호는 암호화되어있기때문에 암호화해서 전송해서 비교를 해야한다 .
  //암호화 메소드는 User.js에 작성한다.
  //로그인 암호화 비밀번호가 일치하면 jwt 토큰을 발급한다
});

app.listen(port, () => console.log(`listening on port ${port}`));
async await를 활용해서 Promise형태로 함수를 만들어서 조금더 간결하게 코드를 볼 수 있도록 해 보았다.
then을 사용해서 isMatch 값을 넘겨받는 형태로 사용하였다.
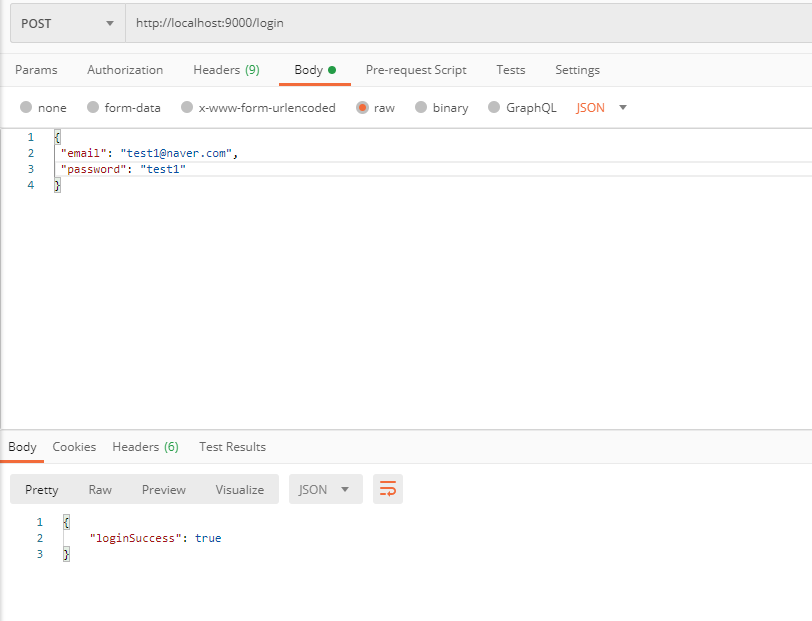
Postman으로 요청을 보내면 정상적으로 동작하는것을 확인 할 수있다.

이제 로그인시 JWT를 생성해서 구현 해야한다.
먼저 jwt(jsonwebtoken) 를 다운받아준다
npm i jsonwebtoken --save
jwt를 생성하는 메소드를 User.js에 선언해준다
User.js
const mongoose = require("mongoose");
const bcrypt = require("bcrypt");
const saltRounds = 10;
const jwt = require("jsonwebtoken");

const userSchema = mongoose.Schema({
  name: {
    type: String,
    maxlength: 50,
  },
  email: {
    type: String,
    trim: true, //dhsdb 1541 @naver.com 을 dhsdb1541@naver.com로 trim
    unique: 1,
  },
  password: {
    type: String,
    minLength: 5,
  },
  lastName: {
    type: String,
    maxLength: 50,
  },
  role: {
    type: Number,
    default: 0,
  },
  image: String,
  token: {
    type: String,
  },
  tokenExp: {
    type: Number,
  },
});

//save 메소드가 실행되기전에 비밀번호를 암호화하는 로직을 짜야한다
userSchema.pre("save", function (next) {
  let user = this;

  //model 안의 paswsword가 변환될때만 암호화
  if (user.isModified("password")) {
    bcrypt.genSalt(saltRounds, function (err, salt) {
      if (err) return next(err);
      bcrypt.hash(user.password, salt, function (err, hash) {
        if (err) return next(err);
        user.password = hash;
        next();
      });
    });
  } else {
    next();
  }
});

userSchema.methods.comparePassword = function (plainPassword) {
  //plainPassword를 암호화해서 현재 비밀번호화 비교
  return bcrypt
    .compare(plainPassword, this.password)
    .then((isMatch) => isMatch)
    .catch((err) => err);
};

userSchema.methods.generateToken = function () {
  // let user = this;
  const token = jwt.sign(this._id.toHexString(), "secretToken");
  this.token = token;
  return this.save()
    .then((user) => user)
    .catch((err) => err);
};

const User = mongoose.model("User", userSchema);

module.exports = { User };
jwt.sign을 이용해서 jwt 토큰을 생성해준다 jwt.sign(변환할 토큰이름, "임의로 지정한 복호화를 위한 변수")
server.js
const express = require("express");
const app = express();
const port = 9000;
const bodyParser = require("body-parser");
const mongoose = require("mongoose");
const { User } = require("./models/User");

app.use(bodyParser.urlencoded({ extended: true }));
app.use(bodyParser.json());

//이곳에 mongodb 사이트에서 카피한 주소를 이곳에 넣으면 된다.
const dbAddress =
  "mongodb+srv://root:root@cluster0-f3nrh.mongodb.net/<dbname>?retryWrites=true&w=majority";

mongoose
  .connect(dbAddress, {
    useNewUrlParser: true,
    useUnifiedTopology: true,
    useCreateIndex: true,
    useFindAndModify: false,
  })
  .then(() => console.log("MongoDB Connected"))
  .catch((err) => console.log(err));

app.get("/", (req, res) => res.send("Hello world!!!!"));

app.post("/register", (req, res) => {
  //회원가입을 할때 필요한것
  //post로 넘어온 데이터를 받아서 DB에 저장해준다
  const user = new User(req.body);
  user.save((err, userInfo) => {
    if (err) return res.json({ success: false, err });
    return res.status(200).json({ success: true });
  });
});

app.post("/login", (req, res) => {
  //로그인을할때 아이디와 비밀번호를 받는다
  User.findOne({ email: req.body.email }, (err, user) => {
    if (err) {
      return res.json({
        loginSuccess: false,
        message: "존재하지 않는 아이디입니다.",
      });
    }
    user
      .comparePassword(req.body.password)
      .then((isMatch) => {
        if (!isMatch) {
          return res.json({
            loginSuccess: false,
            message: "비밀번호가 일치하지 않습니다",
          });
        }
    //비밀번호가 일치하면 토큰을 생성한다
    //jwt 토큰 생성하는 메소드 작성
        user
          .generateToken()
          .then((user) => {
            res
              .cookie("x_auth", user.token)
              .status(200)
              .json({ loginSuccess: true, userId: user._id });
          })
          .catch((err) => {
            res.status(400).send(err);
          });
      })
      .catch((err) => res.json({ loginSuccess: false, err }));

  });

});

app.listen(port, () => console.log(`listening on port ${port}`));
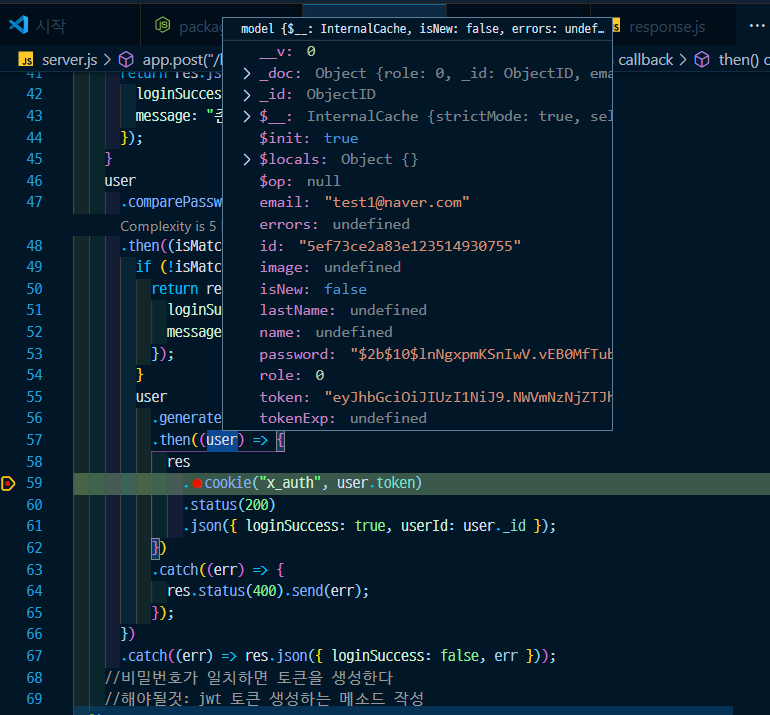
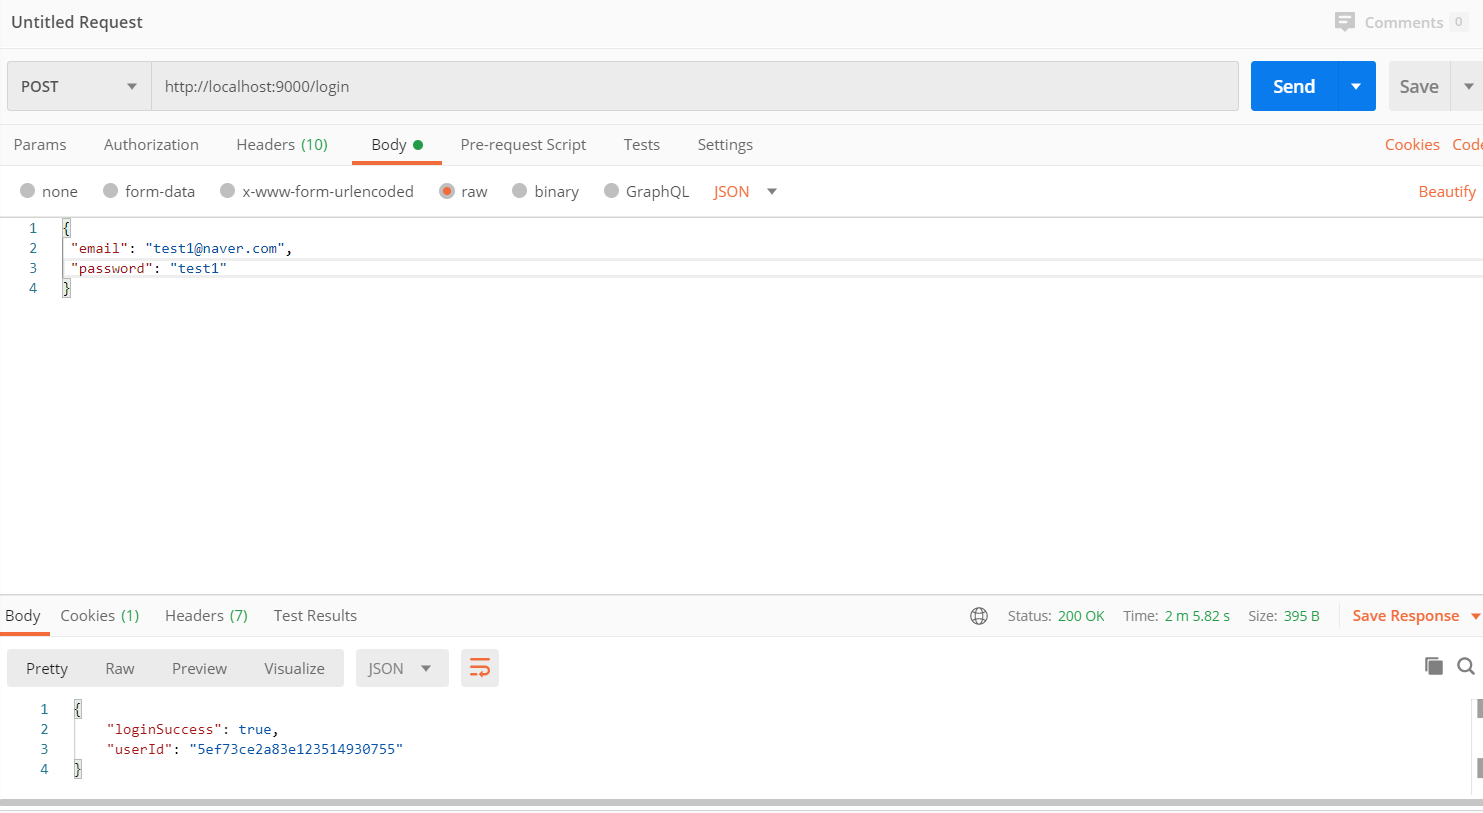
token이 생성되면 cookie에 토큰을 저장하고 loginSuccess: true를 보내준다.


정상적으로 쿠키에 jwt 저장이 된것을 확인 할 수 있다.
'Node.js > node 활용하기' 카테고리의 다른 글
| express mongodb 활용하기 - 로그아웃 구현하기, cors 적용하기 (마무리) (0) | 2020.06.28 |
|---|---|
| express mongodb 활용하기 - auth middleware 구현하기 (0) | 2020.06.28 |
| express mongodb 활용하기 - 회원가입 구현하기(bcrypt로 암호화) (5) | 2020.06.27 |
| express mongodb 활용하기 - express 기초 셋팅및 mongodb 연결하기 (2) | 2020.06.24 |
| express mongodb 활용하기 - mongodb altas 가입및 셋팅하기 (0) | 2020.06.24 |


