<!DOCTYPE html>
<html lang="en">
<head>
    <meta charset="UTF-8">
    <meta name="viewport" content="width=device-width, initial-scale=1.0">
    <title>Document</title>
    <style>
        @keyframes sampel-ani{
            0% {
                transform: translate(0, 0);

            }
            50% {
                transform: translate(300px, 0);
                background: red;
            }
            100% {
                transform: translate(400px, 500px);
            }
        }

        .box{
            display: flex;
            align-items: center;
            justify-content: center;
            width: 100px;
            height: 100px;
            border:1px solid #000;
            background: #fff000;
            animation: sampel-ani 3s linear forwards;
        }
        .box:hover{
            animation-play-state: paused;
        }

    </style>
</head>
<body>
    <h1>
        Animation
    </h1>
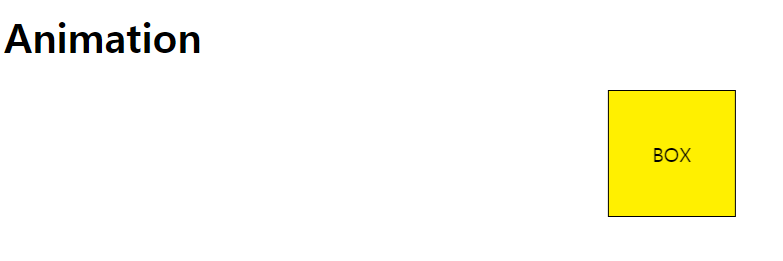
    <div class="box">BOX</div>
</body>
</html>
keyframe
키프레임은 변화가 있는 지점을 키 프레임이라 한다.
CSS animation은
timeline을 활용해서 각 구간을 퍼센트별로 지정해서 특정 CSS 이벤트들을 지정해 줄 수 있다.


animation-duration
애니메이션 실행시간
animation-timing-function
애니메이션 효과의 시간당 속도를 설정한다.
- linear 애니메이션 효과가 처음부터 끝까지 일정한속도
- ease 기본값, 천천히 시작되어 빨라지고 마지막에는 느려진다
- ease-in 애니메이션 효과가 천천히 시작
- ease-out: 애니메이션 효과가 천천히 끝
- ease-in-out 애니메이션 효과가 천천히 시작해서 천천히 끝
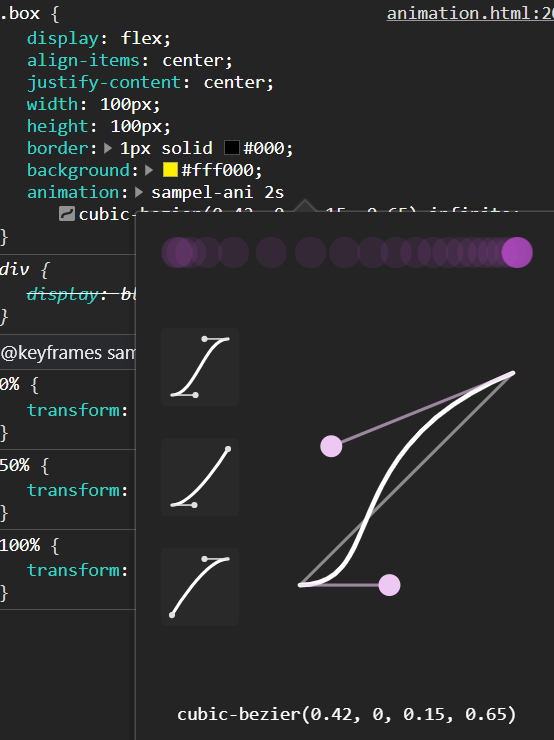
- cubic-bezier(n,n,n,n): 애니메이션 효과가 사용자가 정의한 cubic-bezier 함수에 따라 진행
- stpes 애니메이션을 스텝에 맞게 끊어서 표현해준다.
animation-delay
delay 이후로 해당 애니메이션을 실행한다
animation-iteration-count
애니메이션의 반복횟수를 지정한다. infinite 지정시 무한 반복
animation-direction
애니메이션이 종료되고 다시 처음부터 시작할지 역방향으로 진행할지 지정
- normal: 매 사이클마다 정방향으로 재생
- reverse: 매 사이클마다 역방향으로 재생, ease-in은 ease-out등으로 변화
- alternate 매 사이클 마다 주기의 방향으로 뒤집는다 정방향 -> 역방향 -> 정방향 순
- alternate 매 사이클 마다 주기의 방향으로 뒤집는다 역방향 -> 정방향 -> 역방향 순
animation-fill-mode
애니메이션이 시작되기 전이나 끝나고 난후 어떤 값이 적용될지 지정
- forwards: 실행된 애니메이션의 마지막 keyframe에 의해 설정된 계산값을 유지
- backwards: 애니메이션의 스타일을 애니메이션이 시작되기 전에 미리 적용한다.
- both: forwards, backwards 둘다 적용
animation-play-state
애니메이션을 멈추거나 다시 시작
- paused: 애니메이션을 멈춘다
- running: 애니메이션을 시작한다.
animation-name
애니메이션의 중간상태를 지정
image-sprite를 활용
gif는 투명도 적용이 되지 않는 단점이 있기때문에 이미지 스프라이트를 활용해서 진행한다.
sprite sonic png clipart sonic the hedgehog sonic mania - sonic sprite sheet PNG image with transparent background png - Free PN
sprite sonic png clipart sonic the hedgehog sonic mania - sonic sprite sheet PNG Transparent image for free, sprite sonic png clipart sonic the hedgehog sonic mania - sonic sprite sheet clipart picture with no background high quality, Search more creative
toppng.com
위의 사이트를 통해 소닉 이미지를 가져와서 스프라이트를 진행해보겠다.
먼저 png의 가로길이와 세로 길이 가 필요하다.

해당부분은 하단에 708 x 854 라는 부분을 손쉽게 확인할 수 있다.
<!DOCTYPE html>
<html lang="en">
<head>
    <meta charset="UTF-8">
    <meta name="viewport" content="width=device-width, initial-scale=1.0">
    <title>Document</title>
    <style>
        .sonic{
            background: url("images/sonic.png") no-repeat;
            width: 708px;
            height: 854px;
        }
    </style>
</head>
<body>

    <div class="sonic">

    </div>
</body>
</html>
위와같이 코드를 작성 한 후 맨 위 부분을 사용해볼 예정이다.
 .sonic{
            background: url("images/sonic.png") no-repeat;
            /* width: 708px; */
            /* 708을 9로 나눈다 */
            width: 70px;
            /* 854를 9 로 나눈다 */
            /* height: 854px; */
            height: 94.8px;
        }
png의 길이와 각 캐릭터 갯수를 활용해서 이미지 하나를 잘라낸다.


<!DOCTYPE html>
<html lang="en">
<head>
    <meta charset="UTF-8">
    <meta name="viewport" content="width=device-width, initial-scale=1.0">
    <title>Document</title>
    <style>
        @keyframes stand-sonic{
            0%{

            }
            to{
                background-position: -449px 0;
            }
        }
        .sonic{
            background: url("images/sonic.png") no-repeat;
            /* width: 708px; */
            /* 708을 9로 나눈다 */
            width: 73px;
            /* width: auto; */
            /* 854를 9 로 나눈다 */
            /* height: 854px; */
            height: 94.8px;
            animation: stand-sonic 0.8s infinite steps(6);
        }
    </style>
</head>
<body>

    <div class="sonic">

    </div>
</body>
</html>
각 스프라이트의 width와 height를 사용해서
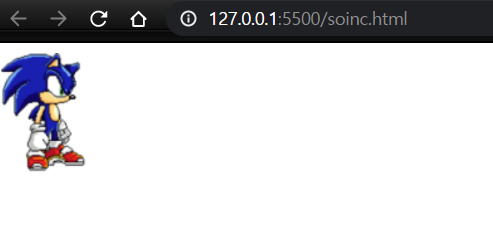
animation- step을 활용해서 눈을 깜빡이는 소닉을 만들어줬다.
step을 활용하면 같은 너비의 부분들을 반복적으로 step으로 넘겨준다
현재 width: 73px height: 94.8px 이니 해당 부분들이 더해지며(width 73px) 씩 step의 단계만큼 진행된다

'CSS' 카테고리의 다른 글
| CSS - Grid (0) | 2020.12.20 |
|---|---|
| CSS - 3D 공간 만들기 (0) | 2020.12.12 |
| CSS - flex (0) | 2020.11.29 |
| CSS - 3D (0) | 2020.11.28 |
| CSS- transform , transition (0) | 2020.11.27 |


